
How to Fit Acoustic Panels?
Acoustic panels are only as effective as the way they are installed. Choosing the right fixing method can affect sound performance, aesthetics, maintenance access, and long-term durability. In this guide, we break down the most common acoustic panel installation methods, the products used to fix them, and the pros and cons of each approach.
Understanding Acoustic Panel Types and Their Specific Installation Requirements
Understanding the type of acoustic panel you are using is essential to achieving the best performance. Different panel types are designed for specific purposes, such as sound absorption, noise reduction, or echo control, and each requires a particular installation approach to work effectively. By matching the correct installation method to the panel type, you can ensure optimal acoustic results and long-lasting performance.
The installation of an acoustic panel depends largely on the type of panel and the visual aesthetic you want to achieve. ISS Acoustic Interiors manufactures and installs a wide range of solutions, including foam acoustic panels, bass traps, ceiling rafts and baffles, wooden slat acoustic panels, PET felt acoustic panels, and fabric-wrapped wall panels. While some installation methods can be mixed and matched across different panel types, others are more dependent on the desired visual style and the specific performance requirements of the space.
Z-BARS
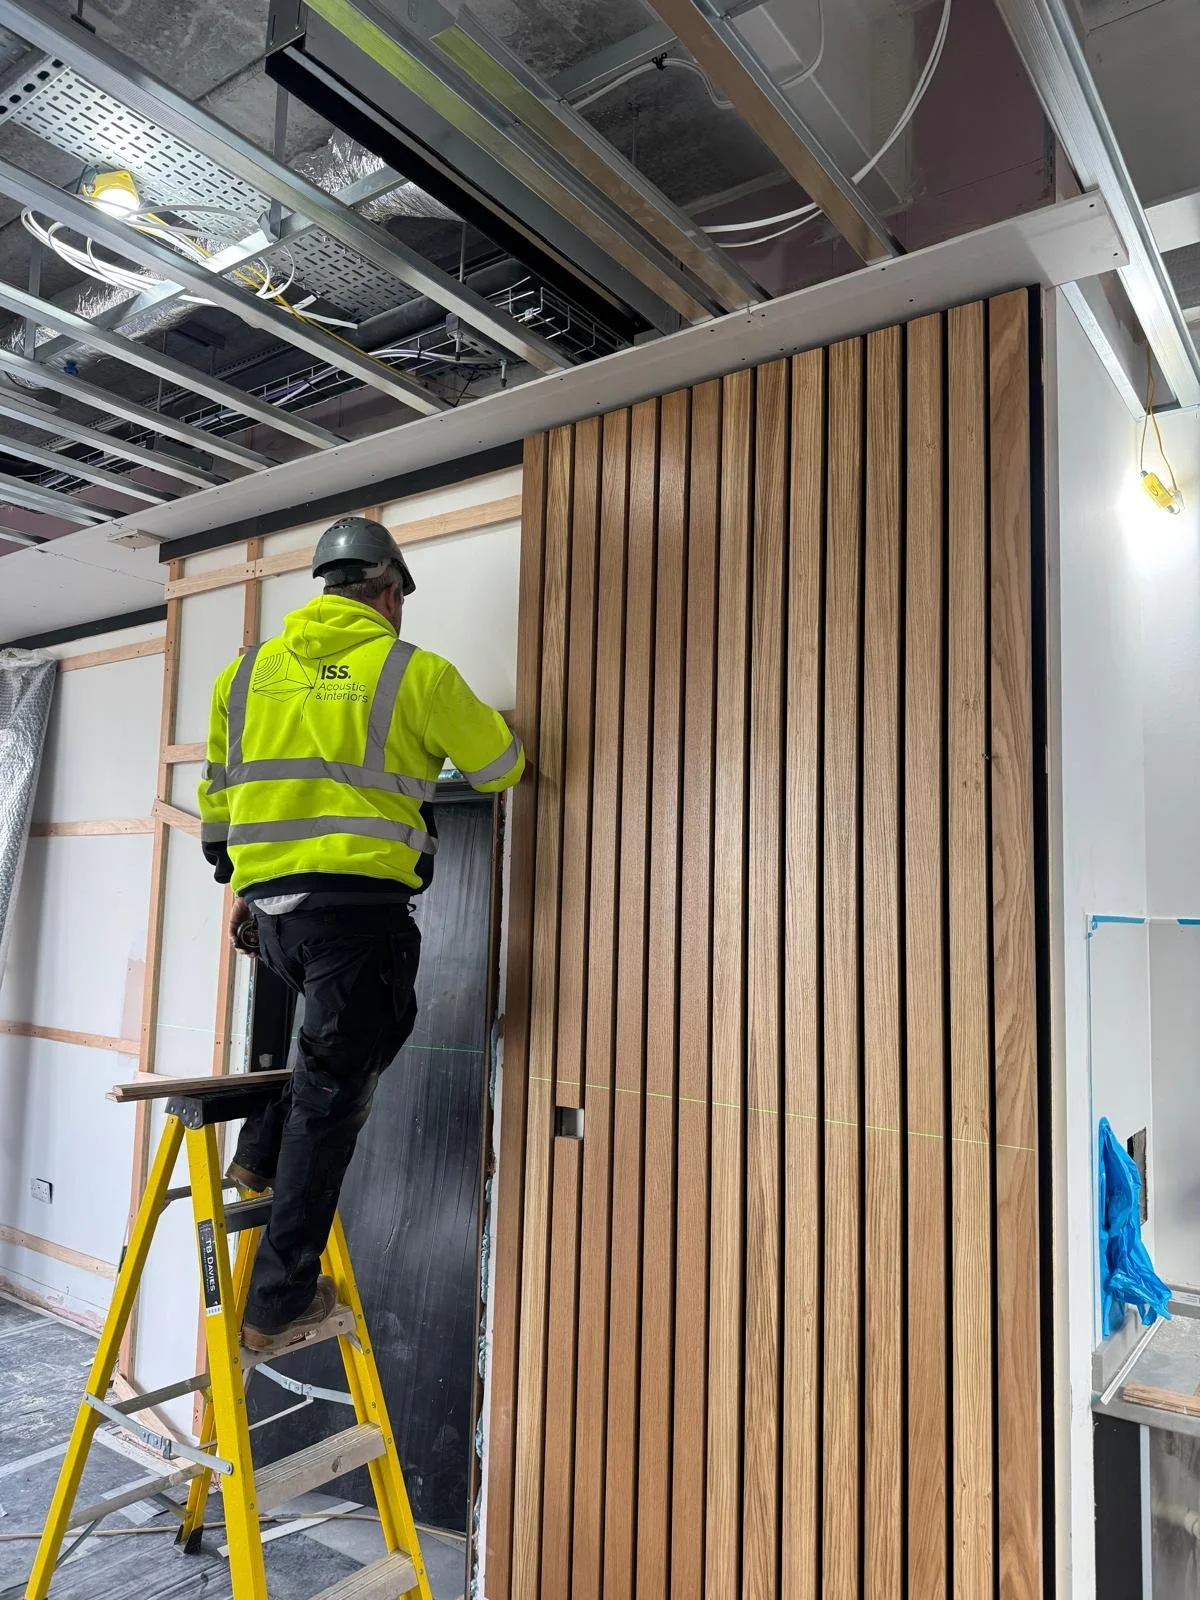
Screw fixing is a secure and versatile installation method commonly used for heavier acoustic panels or where long-term stability is required. Panels are fixed directly to the wall or ceiling using screws, often through concealed fixing points or mounting rails, ensuring a strong and permanent hold. This method is ideal for wooden slat panels, bass traps, and ceiling rafts, particularly in high-traffic or commercial environments where durability is essential.
timber battens
Timber battens are used to create a framework behind acoustic panels, allowing them to be mounted securely while leaving an air gap between the panel and the wall or ceiling. This air gap can improve acoustic performance, particularly for mid- to low-frequency absorption. Batten systems are commonly used with wooden slat panels and larger acoustic panels, and they also help achieve a clean, aligned finish—especially on uneven surfaces or where services need to be conceale
Wire suspension
Wire suspension is an installation method primarily used for ceiling-mounted acoustic panels, rafts, and baffles. Panels are hung from the ceiling using adjustable wire kits, allowing precise control over height and spacing. This method is ideal for large or high-ceiling spaces, as it maximises sound absorption by exposing both sides of the panel while also creating a lightweight, modern visual appearance.
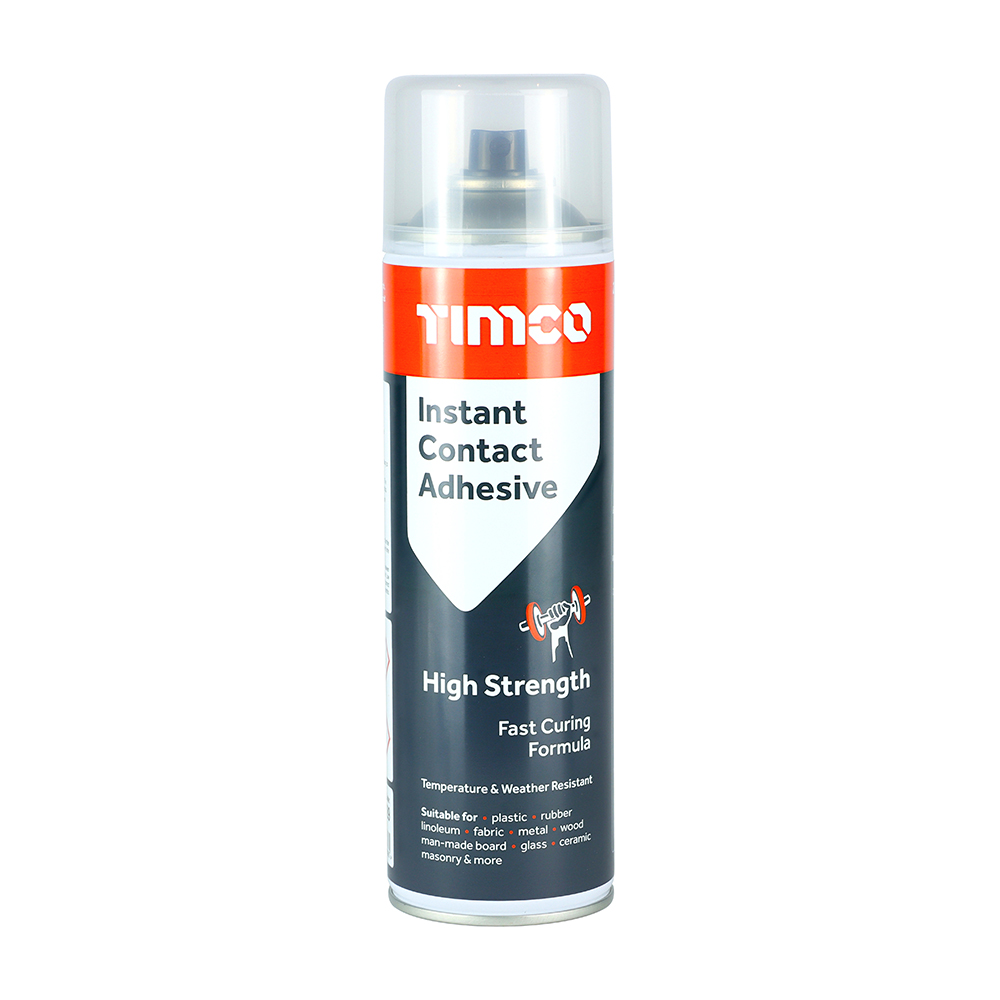
Spray adhesive
Spray adhesive is a quick and straightforward fixing method typically used for lightweight acoustic panels, such as foam or thin PET felt panels. The adhesive is applied evenly to the panel and mounting surface, creating an instant bond once positioned. This method is best suited for permanent installations on smooth, clean surfaces, though panels are not easily removab
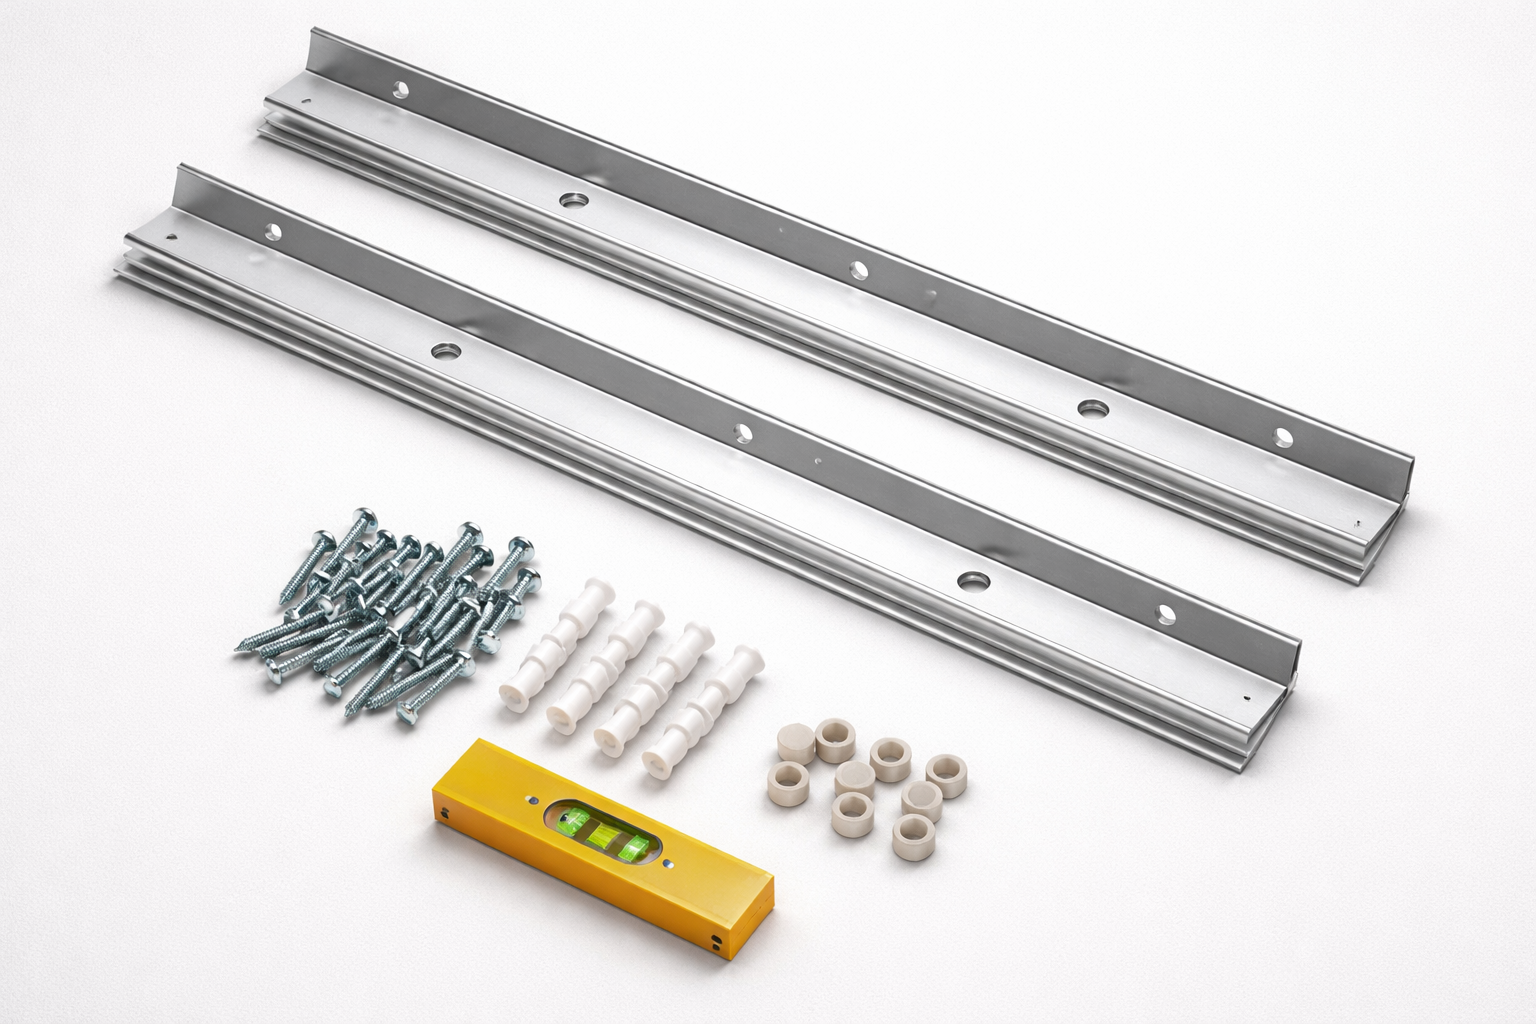
How to Install z-bars?
Z-bars (also known as Z-clips or aluminium cleats) are a secure, concealed fixing system used to mount acoustic panels flush to walls while allowing easy removal and realignment.
Mark out the panel position
Measure and mark the wall to indicate the top edge and fixing points of the panel. Use a spirit level to ensure accuracy.Fix the wall Z-bar
Secure one half of the Z-bar to the wall using suitable wall plugs and screws, fixing into solid structure where possible.Attach the panel Z-bar
Fix the matching Z-bar to the rear of the acoustic panel, ensuring it is aligned parallel with the wall-mounted bar.Hang the panel
Lift the panel and lower it onto the wall-mounted Z-bar so the two profiles interlock. The panel should sit flush against the wall.Check alignment and security
Adjust as needed to ensure the panel is level and firmly seated. Add secondary fixings if required for larger or heavier panels.
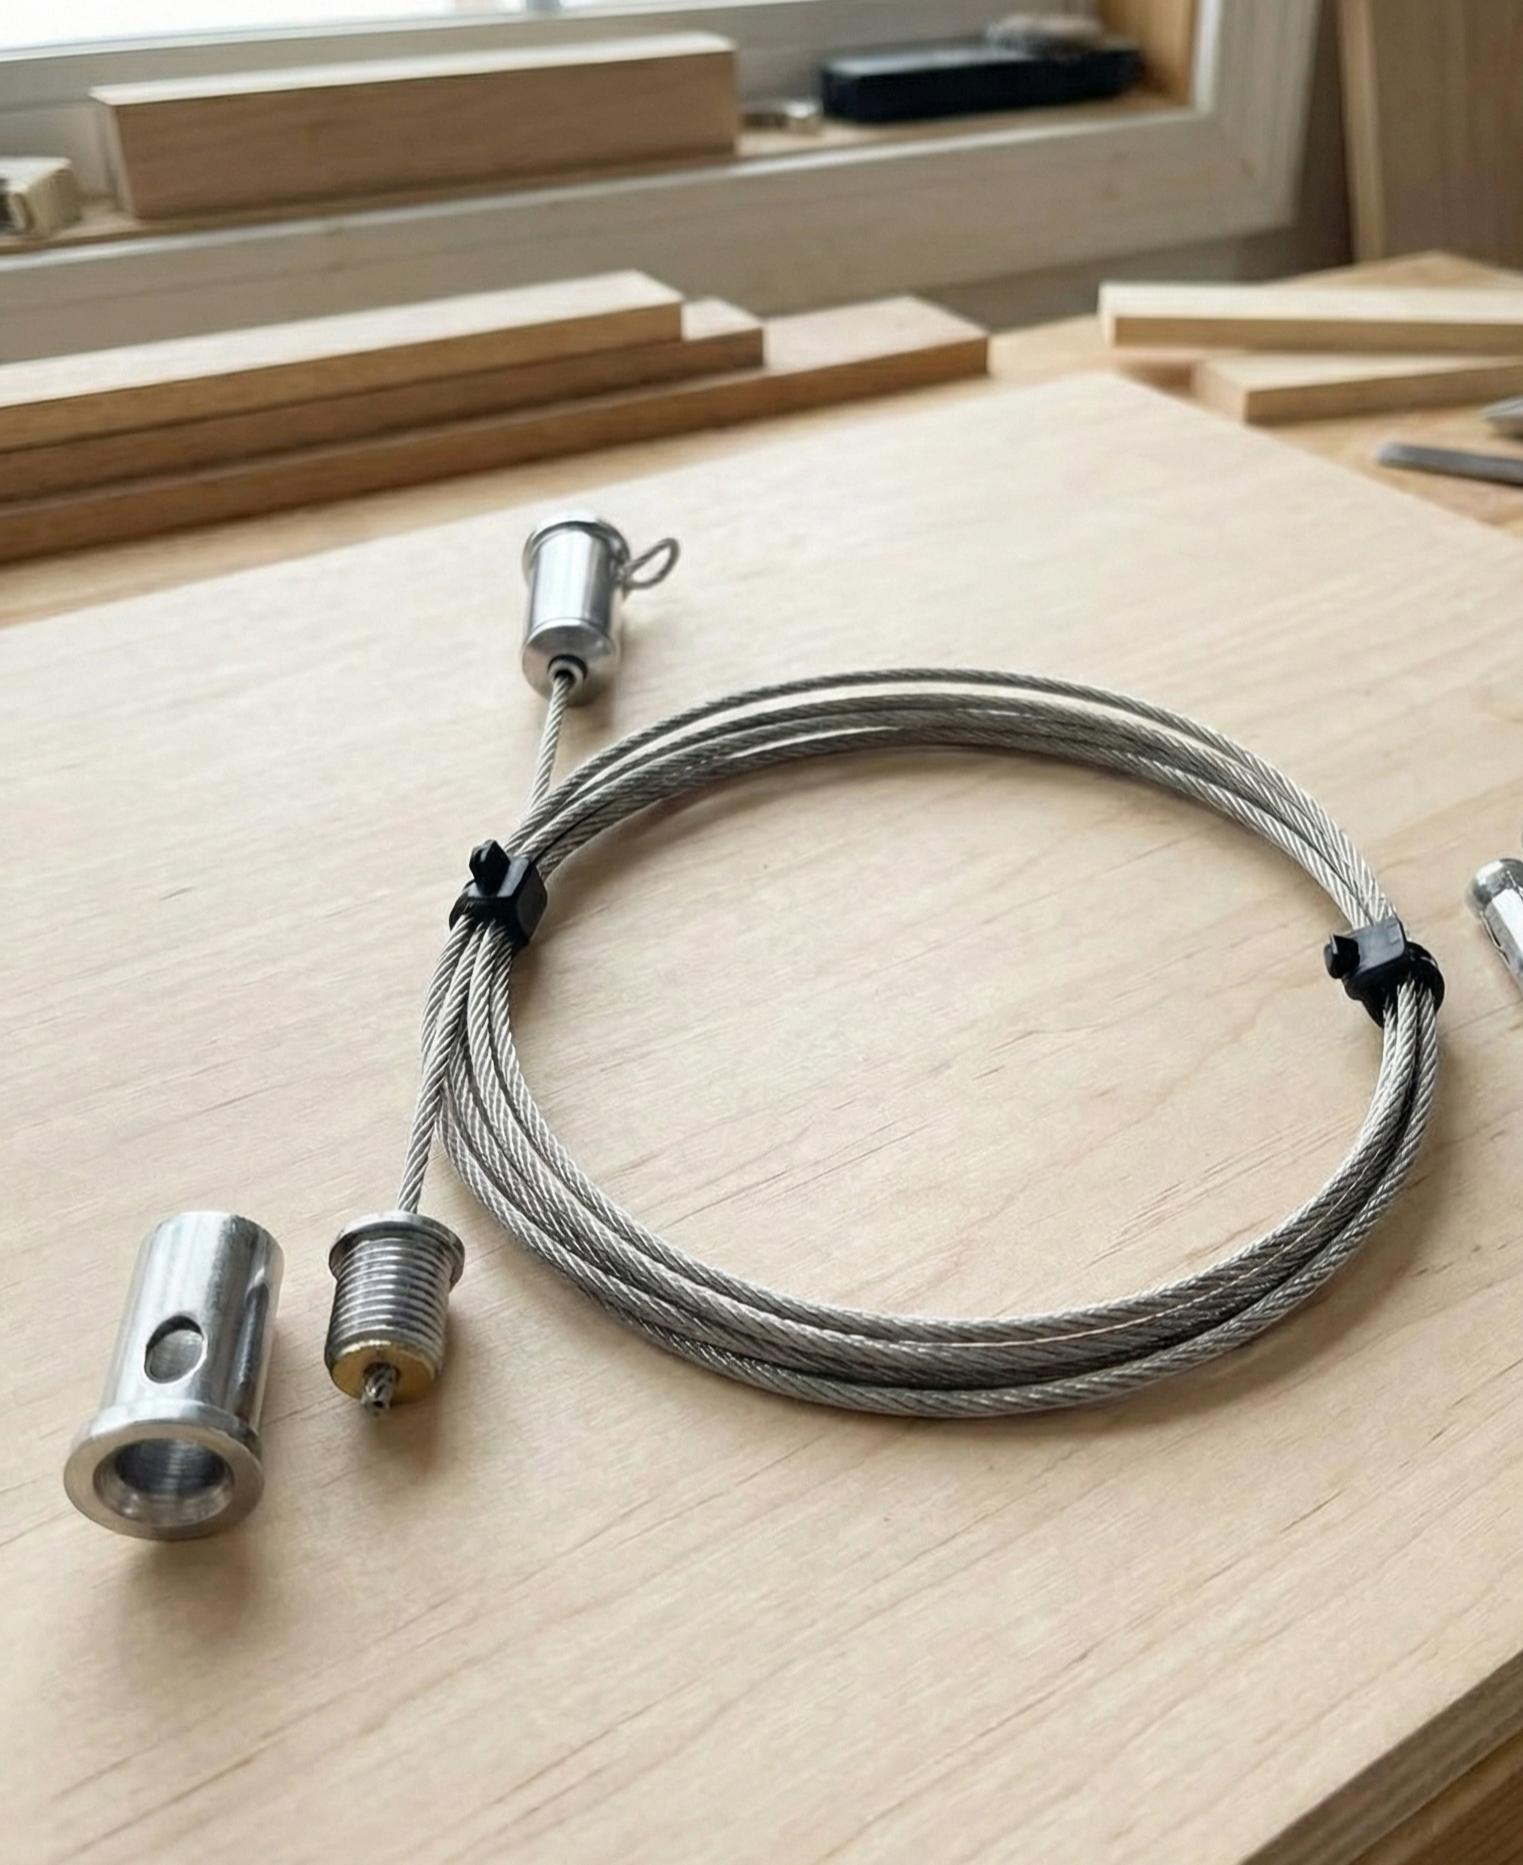
How to Install Wire Suspension Kits
Wire suspension kits are commonly used to install acoustic ceiling panels, rafts, and baffles, allowing precise height adjustment and a clean, floating appearance.
Mark fixing points
Measure and mark the ceiling fixing positions according to the panel layout and manufacturer guidance, ensuring even spacing and alignment.Fix ceiling anchors
Secure the ceiling anchors into solid structure (concrete, timber joists, or suitable ceiling fixings). Always use fixings rated for the panel weight.Attach suspension wires
Connect the adjustable suspension wires to the ceiling anchors, leaving enough slack to fine-tune the final height.Fix wires to the panel
Attach the lower ends of the wires to the panel’s fixing points or suspension brackets, ensuring all connections are secure.Level and adjust
Adjust the wire lengths until the panel is level and positioned at the desired height. Double-check alignment before final tightening.
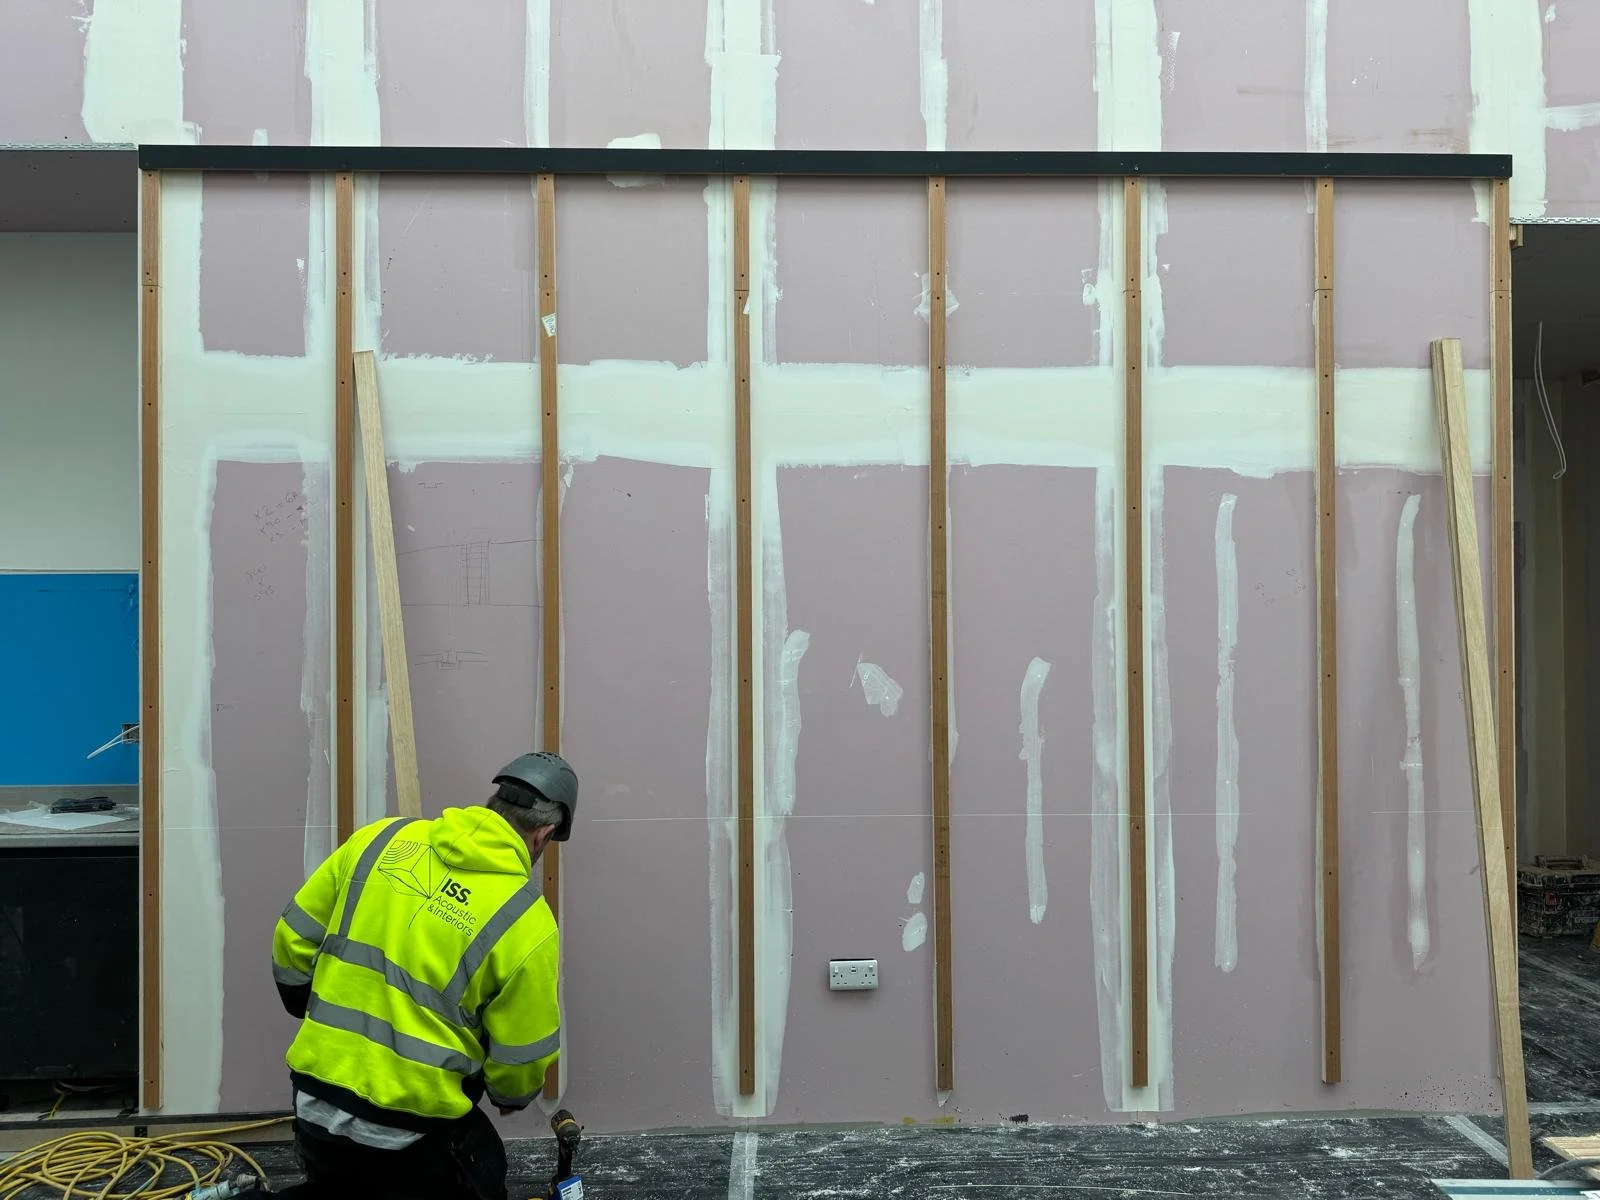
How to Install Timber Battens for Acoustic Panels
Timber battens are commonly used to create a fixing framework and air gap behind acoustic panels, improving both installation accuracy and acoustic performance.
Plan the batten layout
Mark out the batten positions on the wall or ceiling, spacing them evenly and aligning them with the panel fixing points. Check for services before drilling.Fix battens to the surface
Secure the timber battens to the wall or ceiling using appropriate screws and fixings, ensuring they are fixed into solid structure. Use a spirit level to keep battens straight and true.Create an air gap (if required)
The depth of the battens will automatically form an air gap behind the panel, which can enhance acoustic performance, particularly for mid- and low-frequency absorption.Attach the acoustic panel
Fix the acoustic panel directly to the battens using screws, concealed fixings, or manufacturer-recommended mounting systems.Check alignment and finish
Ensure panels are level, evenly spaced, and securely fixed before completing the installation.
How to Install Acoustic Panels Using Adhesive Spray
Adhesive spray is a quick and simple fixing method best suited to lightweight acoustic panels, such as foam or thin PET felt panels, where a permanent bond is acceptable.
Prepare the surface
Ensure the wall or ceiling surface is clean, dry, smooth, and free from dust or grease. Poor surface preparation can weaken the bond.Mark panel positions
Measure and mark the layout before applying adhesive to ensure accurate placement, as panels cannot be easily repositioned once fixed.Apply the adhesive spray
Evenly spray adhesive onto both the back of the panel and the mounting surface, following the manufacturer’s coverage and drying time guidelines.Fix the panel in place
Carefully position the panel and press firmly across the surface to ensure full contact and a strong bond.Allow to cure
Leave the adhesive to fully cure before disturbing the panel, as per the adhesive manufacturer’s instructions.

How ISS Acoustic & Interiors Can Help
At ISS Acoustic & Interiors, we specialise in transforming commercial spaces into calm, focused, and productive environments.
Custom acoustic solutions to meet BB93 standards
We create environments where students learn better and teachers teach more comfortably.
Contact Us today to arrange a Free Consultation or discuss how we can improve the sound of your school.